

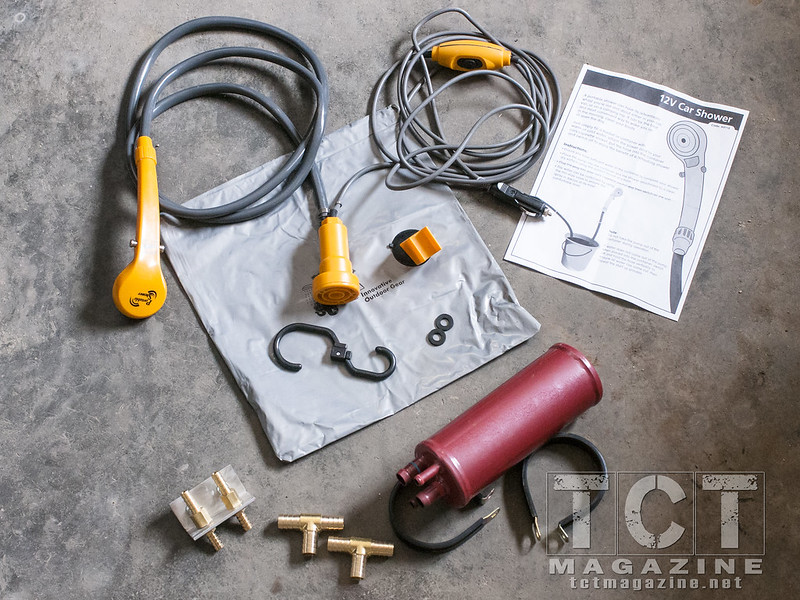
The Hot Shower Kit from Cruiser Outfitters contains:
• 1 - Heat Exchanger: HE1A
• 1 - Shower Head & Pump
• 2 - Coolant Line T-Connectors (not used)
• 1 - Bumper Bracket Fitting Kit (not used)
• Price: $335.00
We also used the following components:
• 5/8" ID Coolant Hose (3'-6' depending on heat exchanger mounting location)
• 6 - 3/8" Hose Clamps
• 4 - 5/8" Hose Clamps
• Misc. Nuts & Bolts (for mounting bracket)
• 3/8" ID High Temp Fresh Water Hose (10'+ depending on your setup)
• 2 - 3/8” Brass male quick-disconnect shutoff fittings with 3/8” NPT female pipe
• 2 - 3/8” Brass barbed fitting to 3/8” NPT male pipe
• 2 - 3/8” Brass female quick-disconnect shutoff fittings with barbed ends
• 1/4-20 UNC stainless steel mounting hardware
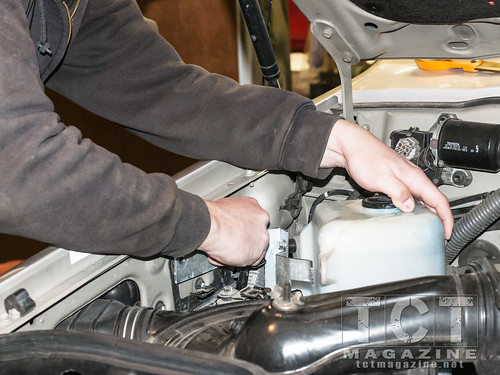
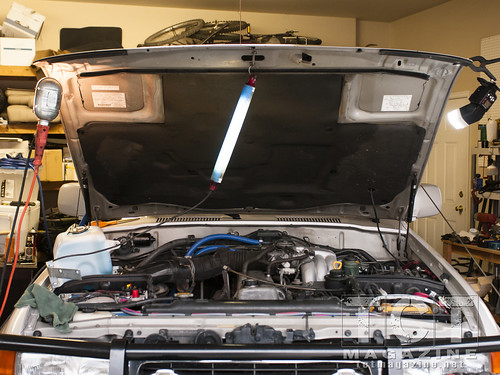
I decided to mount the kit’s heat exchanger to the passenger-side inner fender. I had previously installed a second battery and my Slee Offroad Windshield Washer Relocation Kit needed to be detached to gain access to the inner fender.
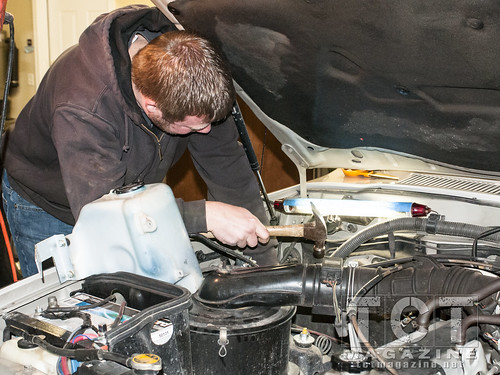
With the windshield washer reservoir removed, I was able to select a location for the heat exchanger on the inner fender. Using a center punch and hammer, I was able to dimple the inner fender where the mounting holes would need to be located.
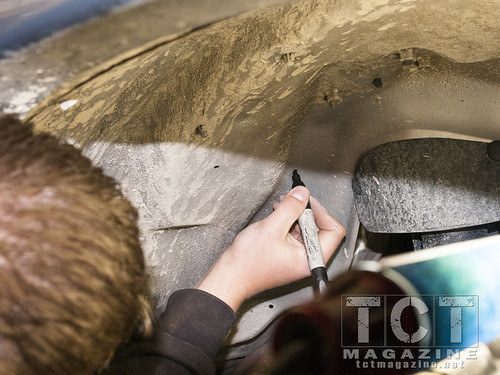
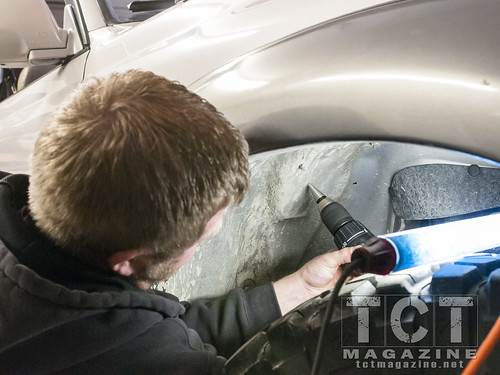
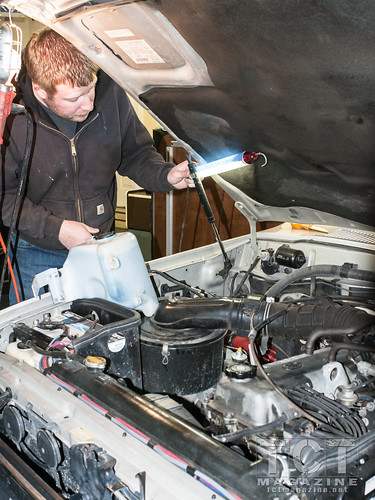
I used a sharpie to help identify the mounting hole locations and then drilled the holes out using a step drill bit to a diameter of 17/64” – the free-fit diameter for 1/4-20 UNC bolts. I then installed the 1/4-20 mounting hardware, with the bolts sticking up through the fender, and secured the heat exchanger in place.

Related Articles

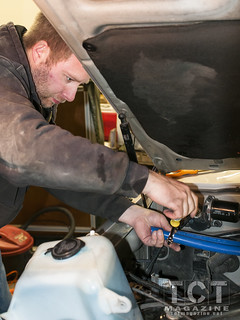
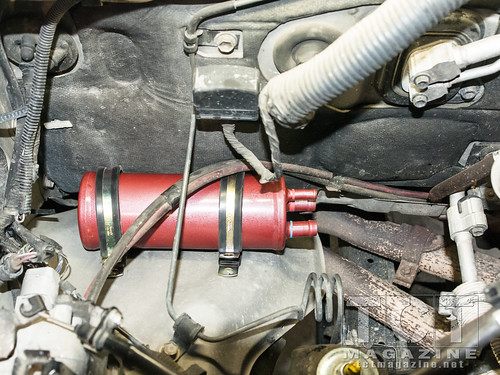
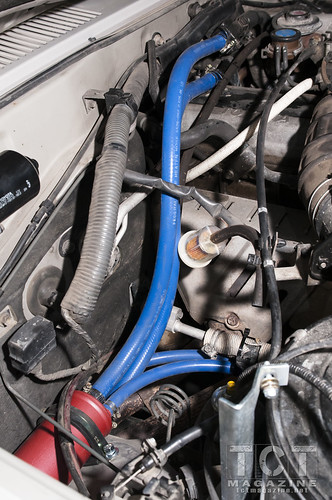
I chose to utilize the FZJ80’s heating system’s temperature control valve (TCV) to adjust the amount of coolant traveling to the heat exchanger. The TCV is located on the top of the firewall and controls the amount of heated coolant that is passed through the Land Cruiser’s heater core. By replacing the U-shaped loop of coolant hose with the heat exchanger, I can control the temperature of the shower water in the same way I can control the amount of heat in the Land Cruiser.
I first started by removing draining some of the coolant from the radiator. The TCV is one of the highest points in the system, so it does not take much to get the coolant down below this point. Once the coolant level was lowered I removed the U-shaped loop, coming from the TCV, by cutting the hose clamps and sliding the hose off. I then ran new 5/8” ID heater hose from the TCV to the heat exchanger and back, tightening everything down with hose clamps.
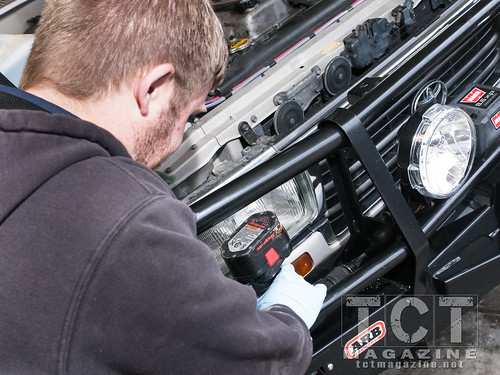
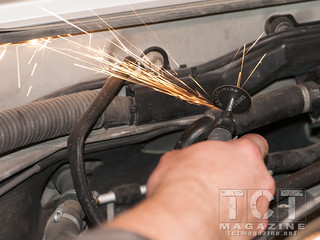
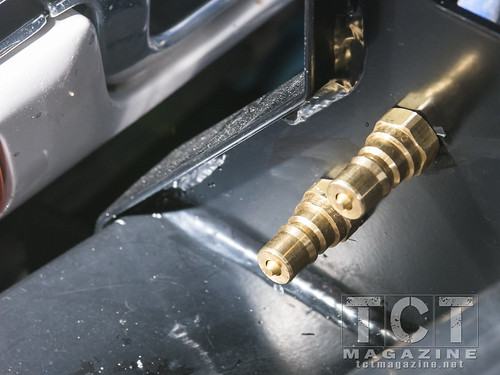
I chose to not use the supplied bumper bracket kit and instead to install a set of quick disconnect fittings. I chose to mount the fittings, on the ARB bumper, just below the passenger-side headlight. The location would give me easy access and still protect the fittings during travel. I marked off the location with a center punch and used a step drill bit to create the mounting holes in the bumper. After cleaning up the holes with a small file, I applied some paint to the exposed metal. I applied some Teflon tape to the male barbed fittings, slid on a backing washer, and then threaded on the male quick disconnect fittings.
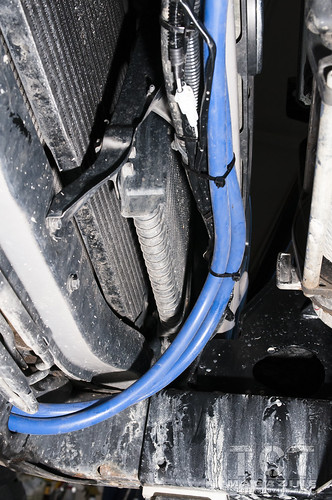
With the quick disconnect fittings installed, I set out to route the 3/8” heater hose. Using zip-ties to secure them in place, I ran the pair of hoses from the heat exchanger, down along the frame rail, through the hole on the driver-side of the front cross member, and up to the bumper. I was careful to avoid the exhaust manifold and all moving parts when routing the hoses.
I finished everything up by splicing into the hose for the supplied shower and connecting the two female quick disconnect ends. Doing so allows me to quickly connect the pump and shower head to the heat exchanger lines when we get into camp after a long, and dusty, day on the road.
Final Thoughts:
I am really impressed with how easy it was to install the shower and how well the shower performed on this summer’s trips. The folks at Cruiser Outfitters had a great suggestion on using the system. They suggested that when I get into camp I should leave the truck running, connect the shower head and pump, place both in our water bucket, and let the water recirculate while I set up camp. Once I am ready I can simply turn off the truck and we can take our showers. The method worked really well, although I learned not to take too much time setting up camp – man that heat exchanger is efficient, heating up the shower water faster than I expected.
To get your copy of theOctober 2014 issue of TCT Magazine: FIND US ON: |
|