When looking for a proper bed rack for the rig, there were many options to choose from for an off-the-shelf bed rack with some optional features to choose from. These bed racks would have done the job, but they all seemed to be missing something from my ideal bed rack. When discussing my plans with Scotty at Addicted Offroad, he knew exactly what I was going for and told me him and his crew would be able to build me a bed rack to fit all my needs. I was looking for a bed rack low enough to reduce some wind resistance that is common with bed rack mounted RTTs; the ability to store Rotopax, Maxtrax, a shovel, an axe, a hi-lift, and a fire extinguisher; have multiple light mounts, and tie down options; and fit within the bed rails so I can still run my soft top during the winter. This project was a perfect fit for Addicted Offroad and their knack for quality custom fabrication.
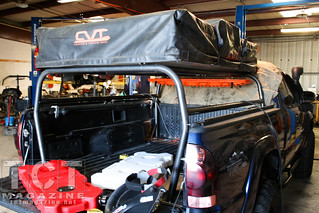
 Given two days, Addicted Offroad turned those plans into reality. Made from nearly 70 feet of 1.75” .120 wall tubing, the bed rack comes in around 150lbs without the accessories. The bed rack will hold the CVT tent, 48” hi-lift up front, Rotopax on both sides, Maxtrax under the tent, shovel and axe will mount to the inside of the side tubes, quick release fire extinguisher mount near the tailgate and has multiple lights for camp and off-road use. I even have the ability to run my soft top over the bed rack with the tent removed for the winter season.
To ensure proper fitment of the bed rack, I had left my truck in the skillful hands of Addicted Offroad. This allowed them to build the rack on the truck and make any adjustment necessary before finalizing. With goals to keep the height as low as possible and frame of the rack within the bed rails, this was the best way to make that happen.
Keeping the frame of the rack within the bed rails not only allows me to run the soft top still, it also allows for a stronger foundation. Many off-the-shelf bed racks rest on the bed rails putting additional stress on the sides of the bed. Addicted was able to build solid baseplates to mount the bed rack to and utilize the existing bed bolts and D-ring bolts for additional strength.
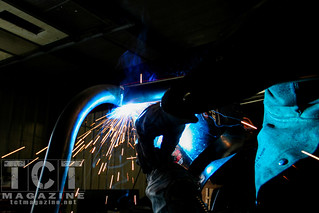
With the outer frame established and tacked together, it was time to work on tying things together. The upper support tubing was welded in along with the cross members that will be used to clamp the RTT to.
 After the main structure was assembled, it was time to turn their attention to the accessories. It took a little bit of trial and error to figure the best placement for all the accessories, but patience paid off and proper homes were found for all items needed. Tabs were welded into place to allow the Maxtrax to mount up and out of the way. Side mounts will come later to hold the Rotopax and the hi-lift will be mounted in the front of the bed.
With a final layout determined, it was time to pull the rack out of the bed for final welds and a coat of paint.
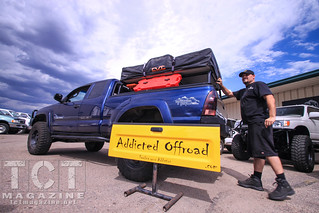
Welded and painted, final assembly was all that was left! Rotopax found their homes on the sides of the bed rack, while the Maxtrax and hi-lift were mounted up on the top and up front. The CVT mounted up for a perfect fit to top everything off.
Related Articles
With the addition of an Addicted Offroad decal, Scotty gave his final approval of the project and handed the truck back over. This was my first project with Addicted and hopefully won’t be the last. From design to finish, they were able to meet all of my requested build specs and beat all of my expectations.
Only thing to do after that was to get out and explore! From the rugged terrain of the Holy Cross wilderness to the vast openness of Southeast Utah, Addicted Offroad’s bed rack has been a vital asset to our travels.
Thanks again to Scotty and his crew at Addicted Offroad for their help with this project! For more information about Addicted Offroad and their latest projects, check them out at www.addictedoffroad.com or visit them through their Facebook page.
All Photos!
[flickr set=72157641278304204]
To get your copy of the January 2014 issue of TCT Magazine:FIND US ON: |

