

Dynatrac is no stranger when it comes to adding strength to off-road rigs over the many years. It was not until recent years when they had an option available for Toyota rigs. Unfortunately, they only offer a replacement axle for the 2005-2015 Tacoma, but lucky for me, I have a 2006 Tacoma. Originally designed for military applications, the ProRock 60 offers a significant improvement in strength without losing ground clearance (yes you heard that correctly).

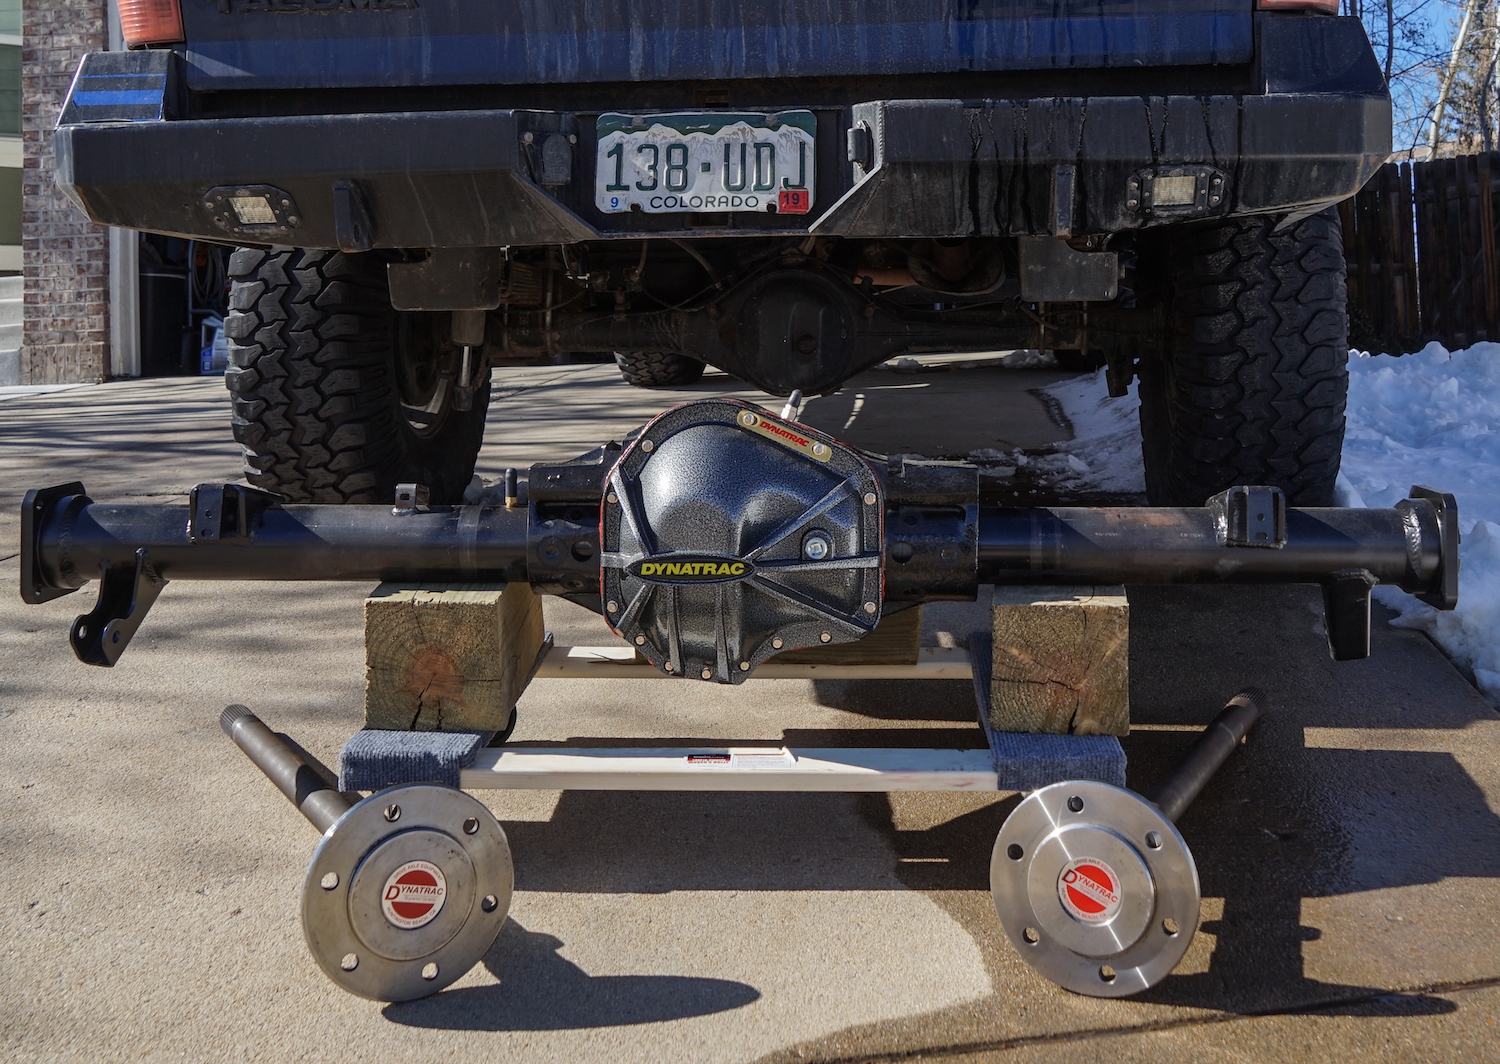
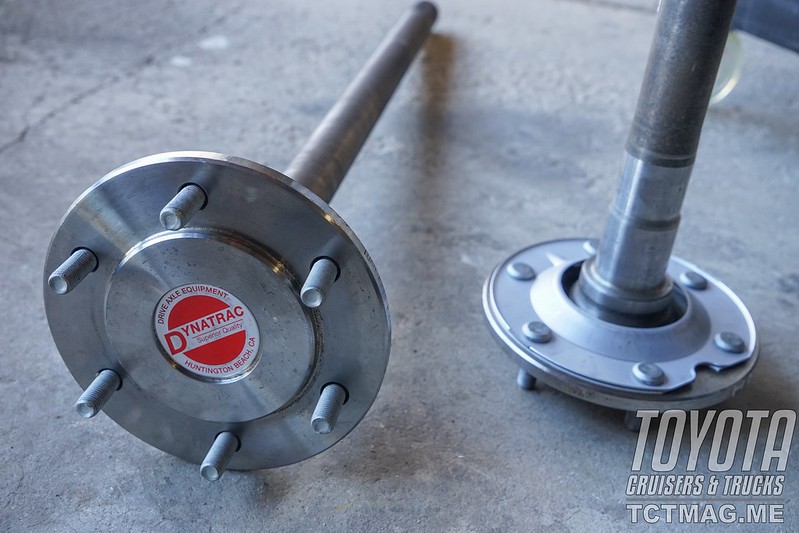
Dynatrac offers their ProRock 60 as a builder kit. The basic package includes the axle housing featuring 3.125” diameter x .313” wall DOM tubing, stock width, leaf spring perches and factory location shock mounts. Dynatrac includes their beefy 35-spline 1.5” diameter, semi-float, USA-grade 1541H alloy axle shafts with a 6 on 5.5” bolt pattern. The ProRock 60 is setup to house a massive 9.75” ring gear and contains their Dual Sump High Volume lubrication system for optimal oiling. The housing and shaft kit will set you back $3,999 plus taxes and shipping.

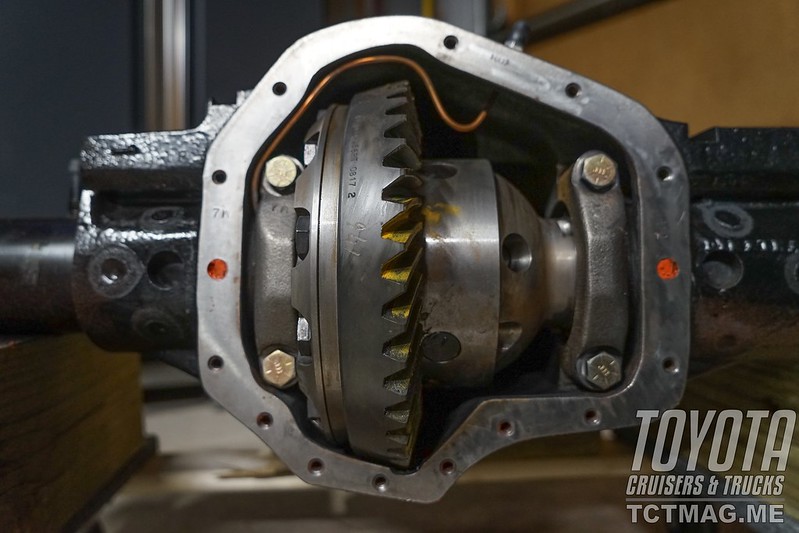
To complete the package, Dynatrac offers a variety of differential and gear options as well as different pinion flange options. This build included an RD167 ARB locker, 4.56 gear set, and the optional Dynatrac flange to mate with Toyota u-joint bearing plate. Prices will vary depending on the options chosen.

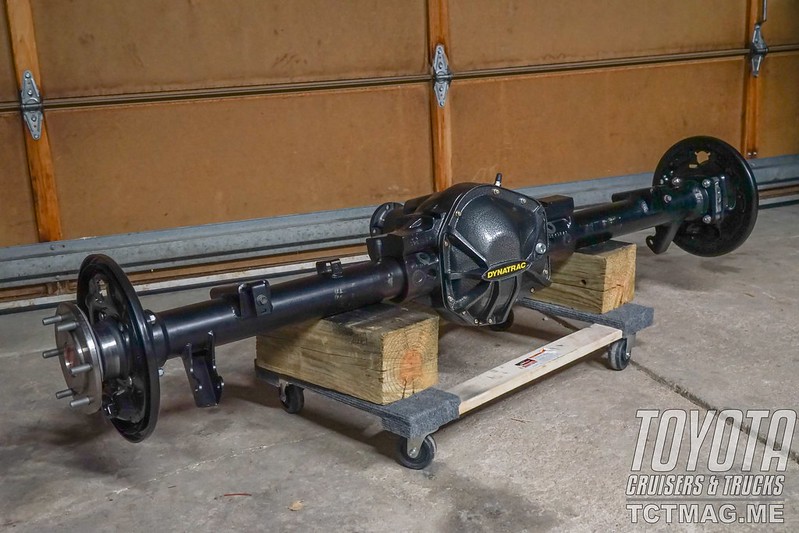
If DIY is not an option for you, Dynatrac does have an option to complete the assembly work of the ProRock 60 for you. However, with a little time and willingness to DIY, you can assemble the axle in your garage and install in your driveway over a weekend.
ASSEMBLY
Before assembly, there will be some parts to track down to complete the axle. OEM parts needed to complete the axle assembly include: left and right unit bearings, axle seals, O-rings, serration nuts and bolts, wheel studs, shaft gaskets, shaft oil deflectors and backing plates. You would also have to choose whether to reuse your drum brake components or install fresh brakes as well.

After accumulating all the necessary OEM replacement parts, it’s time to put it all together. The hardest part of the assembly is pressing all the axle shaft components together. First steps include pressing the wheel studs in. Line up the shaft gasket and shaft oil deflector, loosely insert the wheel studs, and press the studs in firmly. Be careful not to press in too far where the plates are distorted.

When assembly the unit bearings and backing plates, note there is a left and a right side and should not be mixed up. Disassembly afterwards is not a fun task. The instructions give a lot of insight on telling the two sides apart to make sure installation is done properly. There are four serration bolts that are inserted through the backing plate and unit bearing. These bolts will need to be pressed in one at a time. An O-ring is placed inside the retaining ring and lubricated before sliding onto the axle shaft.

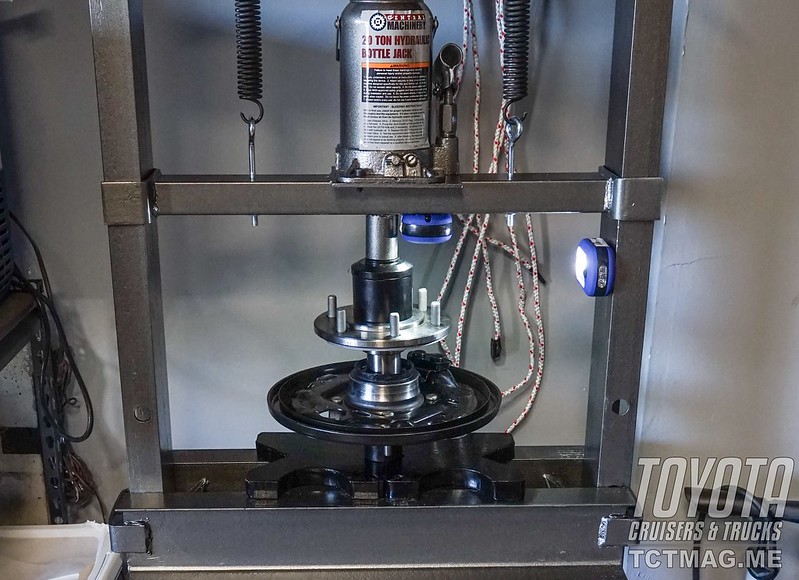
On to the home stretch! Using a couple press tools and a press, press the retaining ring and bearing assembly onto the shaft. When pressing on the unit bearing, take note of the black ring. This is the ABS tone ring and can easily become damaged. If you have a pressure gauge on your press, the gauge will begin to spike when fully compressed. If no gauge, you’ll have to use best judgement to determine when the assembly is fully pressed in.
Congratulations! You now have assembled your beefy 35-spline axle shafts and are almost ready to put the axle together! All that is left is to install your axle seals and bolt in your axle shaft assemblies. The axle seals should end up flush with the tube ends. You can use some grease as an indicator to test the seal around the axle shaft where it meets with the axle seal to make sure you have proper position.
Last step is to slide the axle shafts in and torque down the backing plate nuts to 27 ft lbs. There will be additional steps needed to complete the brake assembly which will be covered later.
INSTALLATION
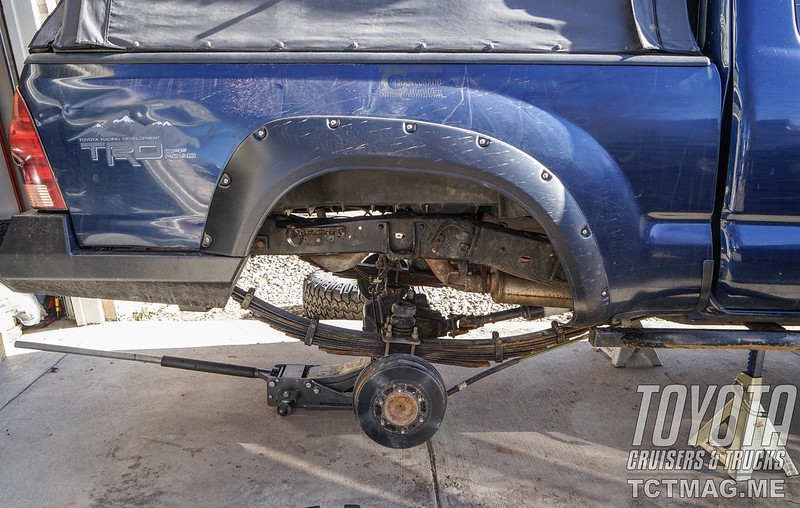
Well, there’s no easy way to put this, but nearly everything must come off in the back. Get the truck supported on some jack stands and start taking things apart. Shocks, brakes, brake lines, driveshaft, ABS sensor lines, e-locker connectors and U-bolts.
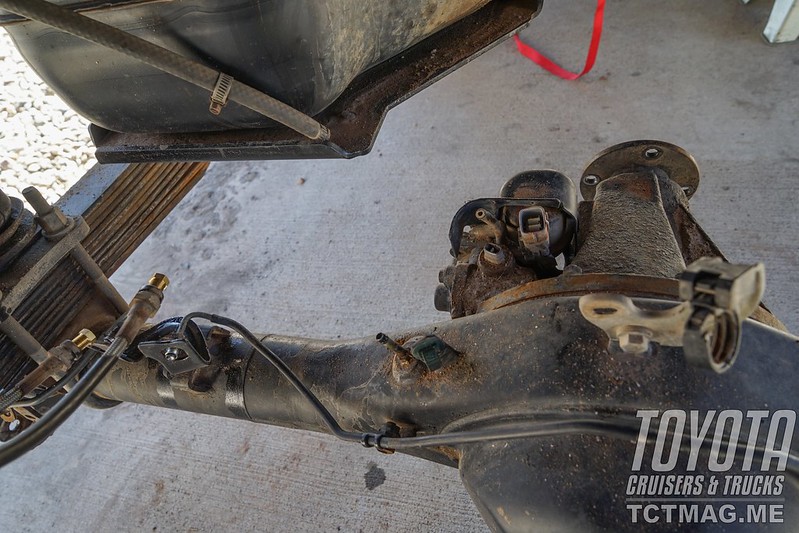
To limit the amount of brake fluid loss, I picked up some brake line plugs that screw into the braided line leaving the hard lines on the old axle for removal later.

Breather line can be disconnected and moved out of the way. If you have an e-locker, you’ll disconnect everything. The wiring harness to the e-locker can be removed since you will not be using it anymore. You can leave the driveshaft connected at the t-case, just strap it up under the truck.
At this time, you’re nearly ready to swap in the new axle. First, you’ll need to transfer over, or rebuild the drum brake assembly. Since I had replaced my pads and drums not long ago, I chose to reuse the drums, pads and brake cylinders. All spring hardware was replaced upon reassembly. The hardline can be reused, however, you will have to carefully reshape it in places since the differential housing is significantly larger. Not all hard line mounts line up on the new axle, so you may have to get creative to secure the hard line on the axle housing.
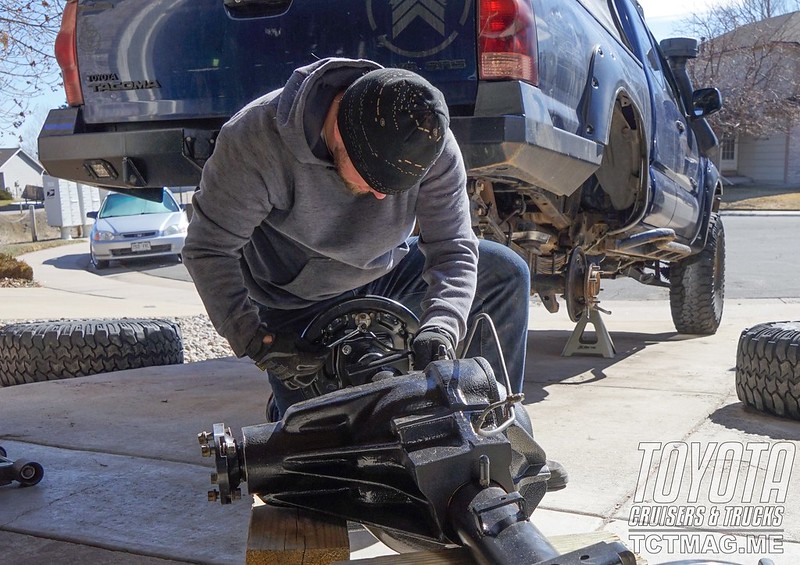
Last steps of disassembly. Disconnect the e-brake cables from the drum housing and remove your U-bolts (remember, always use new U-bolts upon reassembly!). Your axle will be ready to drop out at this time, so have some stands ready.

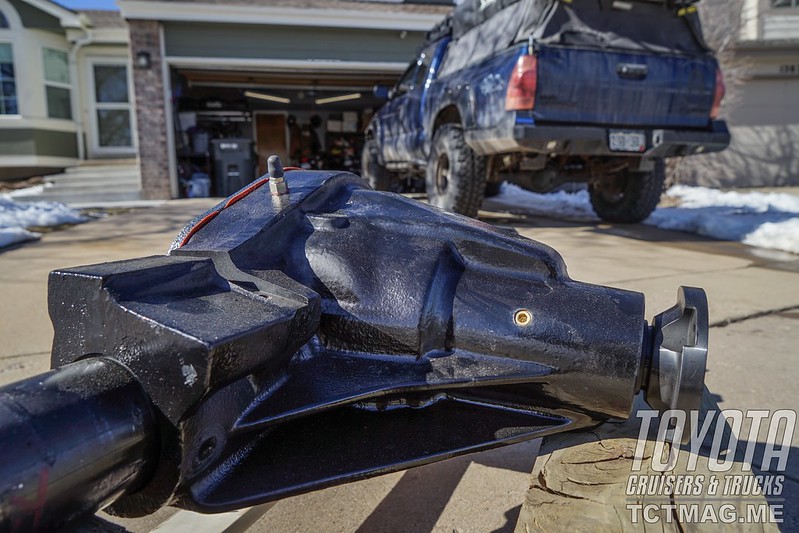
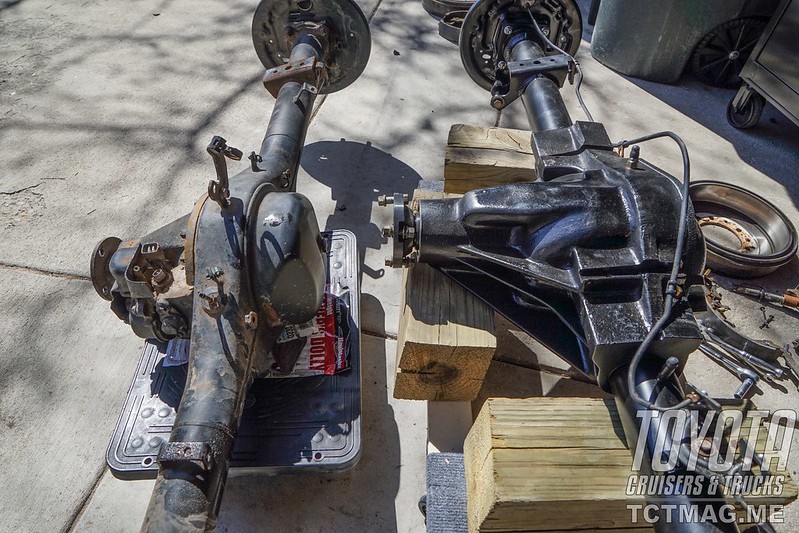
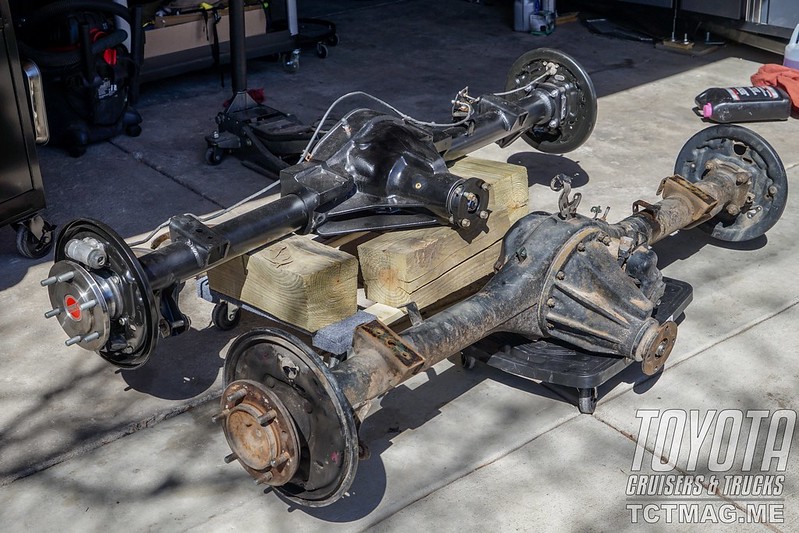
Here’s a few side-by-side comparison shots of the Toyota 8” e-locker axle assembly versus the Dynatrac ProRock60. Take note of the length difference to the pinion flange. This added length will require you to have your driveshaft shortened. Dynatrac offers a Toyota bolt pattern flange, so it will bolt up to the OEM driveshaft if you chose this route, but you will need to modify the shaft length.
Assembly is the opposite of disassembly. Lift the axle up to the leaf springs and line up the centering pins, install new U-bolts and torque to 37 ft lbs. (cross pattern while tightening). Shocks can go back on and reconnect the driveshaft. Reconnect your brake lines and bleed the system. Add fluid to the axle, and you’re ready for the break-in period!

BREAK-IN/MAINTENANCE
As with any new gears, you should follow a break-in process. I’ve always followed 500 miles of varying speeds. The initial drives should be limited to 15-20 mins before letting it cool down. Highway speeds should be limited, but if necessary, stay in the right lane and keep your speeds down when possible. After 500 miles, it’s time to swap the fluids and get on to the real fun!
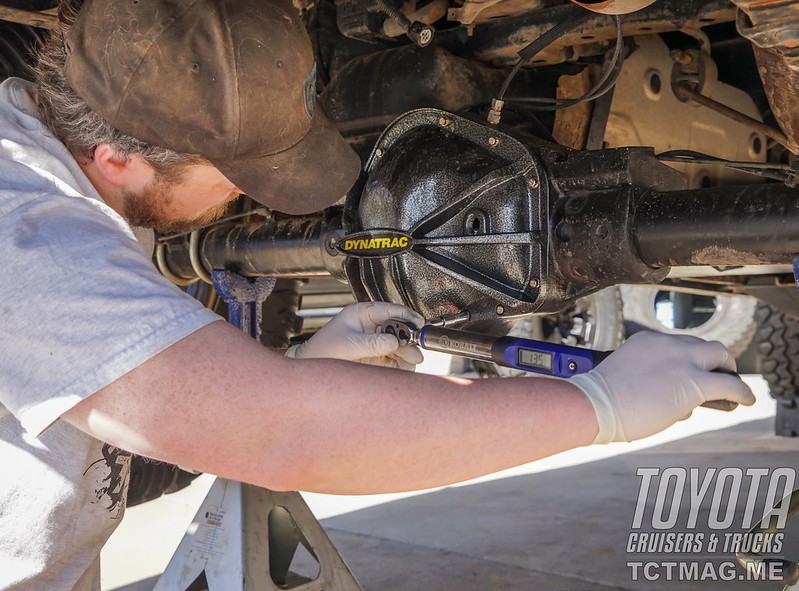
Using a 12-point 5/16 socket, remove the differential cover bolts. I leave a few up top loose while the fluids are draining out. At this time, you can swap in a new gasket or apply new gasket maker. I have been using a Lube Locker gasket, so I do not have to mess with gasket maker anymore.

With the new gasket in place, the cover can go back on and torqued down to 25 ft lbs. Best to tighten in a cross pattern, gradually increasing the torque as you work your way around. Using the main fill hole, fill with your favorite gear oil until fluid begins to come back out the hole.
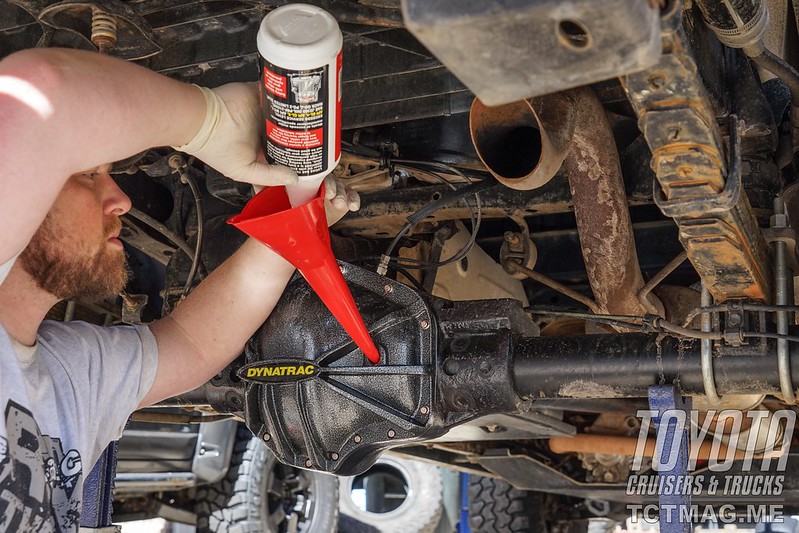
Nope, not done yet. Up by the pinion, is another fill hole that will need some attention as well. Once the rear hole has stopped flowing out, you’ll need to add some additional oil in the forward fill hole. You will add oil until it begins to flow out the main fill hole again. Give it a few minutes to finish leveling itself out inside and plug the fill holes back up…

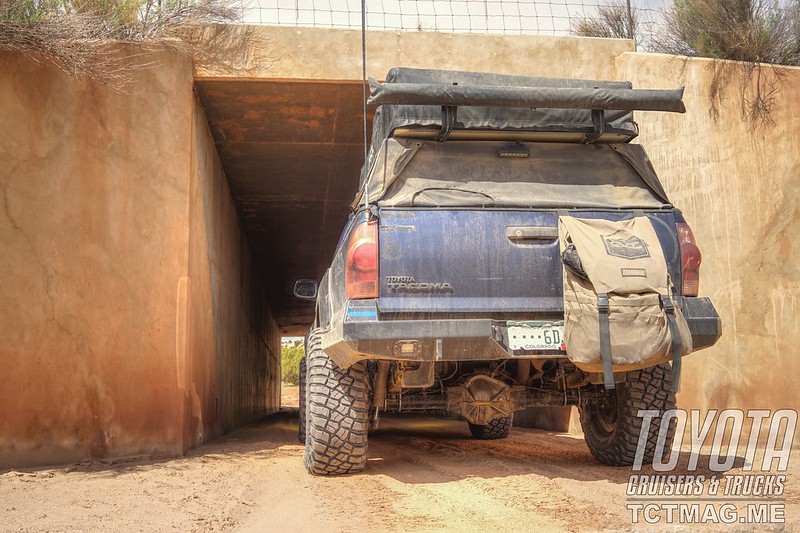
Now it’s time to go Explore with Confidence!

For more information about the Dynatrac ProRock60, visit their website
To get your copy of the
Summer 2019 Issue:


Follow us on Facebook, Twitter, and Instagram to get up-to-date industry news, events, and of course, amazing adventures, stories, and photos!